리액트 강의를 들으면서 인증 로그인 구현 과제를 통해 공부한 firebase auth 패키지 사용법을 정리했다.
먼저, firebase 콘솔에서 프로젝트를 생성해야 한다.
로그인 - Google 계정
하나의 계정으로 모든 Google 서비스를 Google 계정으로 로그인
accounts.google.com
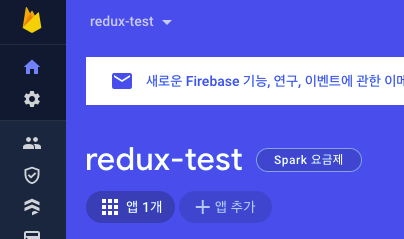
프로젝트 생성을 완료했다면 앱 등록 버튼을 클릭하여 웹 앱을 생성한 프로젝트에 등록하는 작업이 필요하다.
생성한 프로젝트 홈에서 앱 추가 버튼을 클릭한 후, 웹을 클릭하면 웹 앱에 Firebase 추가라는 화면으로 이동할 수 있다.
해당 화면에서 앱 닉네임을 등록하면 Firebase SDK를 추가할 수 있는 단계로 이동할 수 있다.
Firebase SDK 추가
1. firebase 패키지 설치
# npm i firebase
2. firebase initialize 파일 생성
firebase 인증 기능을 사용하기 위해서는 먼저 initializeApp 함수를 실행하여 Firebase를 초기화해야 한다.
리액트 어플리케이션의 경우에는 index.js 파일 내에서 아래 코드를 붙여넣으면 된다.
(혹은 별도의 파일로 분리해서 index.js에서 import하는 방식도 가능하다.)
import { initializeApp } from 'firebase/app';

const firebaseConfig = {
  apiKey: '~~',
  authDomain: '~~',
  databaseURL: '~~',
  projectId: '~~',
  storageBucket: '~~',
  messagingSenderId: '~~',
  appId: '~~',
};
const app = initializeApp(firebaseConfig);
일반 자바스크립트 script 태그를 사용하고 싶은 경우에는 다음과 같은 코드를 body 태그의 가장 아래에 붙여넣으면 된다.
<script type="module">
  import { initializeApp } from "https://www.gstatic.com/firebasejs/9.8.2/firebase-app.js";

  const firebaseConfig = {
    apiKey: '~~',
    authDomain: '~~',
    databaseURL: '~~',
    projectId: '~~',
    storageBucket: '~~',
    messagingSenderId: '~~',
    appId: '~~',
  };

  const app = initializeApp(firebaseConfig);
</script>
firebase auth 기능 구현
firebase auth에서는 회원가입 및 로그인, 로그아웃, 사용자 정보 수정 등을 위한 다양한 인증 관련 메소드를 제공한다.
메소드를 사용하기 위해서는 firebase/auth에서 필요한 메소드를 import하여 사용하면 된다.
일반적으로 이메일 인증 없이 이메일을 이용한 회원가입, 로그인 등의 구현을 위해 사용해야 할 메소드에 대해 알아보자.
현재 접속한 사용자 인증 정보 가져오기
현재 접속한 사용자 인증 정보는 firebase/auth의 getAuth 메소드로 가져올 수 있다.
인증 메소드를 호출하기 위해서는 getAuth로 가져온 Auth 객체를 반드시 인자로 넘겨줘야 한다.
사용법은 다음과 같다.
import { getAuth } from 'firebase/auth';
const auth = getAuth();
현재 접속한 사용자의 프로필 정보 가져오기
위에서 사용한 getAuth 메소드로 얻어온 auth 객체의 currentUser 속성에 접근하면 프로필 정보를 가져올 수 있다.
가져올 수 있는 프로필 요소들은 다음과 같다.
const auth = getAuth();
const user = auth.currentUser;

console.log(user.photoURL);  // 프로필 사진 URL
console.log(user.phoneNumber);  // 휴대폰 번호
console.log(user.metadata);  // 사용자 메타데이터(createdAt, creationTime, lastLoginAt, lastSignInTime)
console.log(user.email);  // 이메일
console.log(user.displayName);  // 표시 이름
console.log(user.emailVerified);  // 이메일 인증 여부(boolean)
console.log(user.isAnonymous);  // 익명 여부(boolean)
혹은 로그인 제공 업체(firebase, google, facebook 등)로부터 프로필 정보를 가져올 수도 있다.
const auth = getAuth();
const user = auth.currentUser;
const providerData = user.providerData;

providerData.forEach((profile) => {
  console.log("Sign-in provider: " + profile.providerId);
  console.log("  Provider-specific UID: " + profile.uid);
  console.log("  Name: " + profile.displayName);
  console.log("  Email: " + profile.email);
  console.log("  Photo URL: " + profile.photoURL);
});
회원가입(이메일 인증 X)
별도의 이메일 인증 없이 이메일, 비밀번호 값만 사용하여 회원가입을 처리하는 경우에는 createUserWithEmailAndPassword 메소드를 사용하면 된다.
사용법은 auth 객체와 email, password를 createUserWithEmailAndPassword의 인자로 넘겨주면 된다.
createUserWithEmailAndPassword를 포함한 대부분의 메소드들은 비동기로 동작하므로 순차적 실행을 위해서는 async/await 키워드를 사용해야 한다.
그리고 비밀번호는 반드시 6자 이상이어야 한다.
firebase auth에서 비밀번호가 6자 미만인 경우에는 자체적으로 auth/weak-password 오류를 발생시킨다.
import { createUserWithEmailAndPassword, getAuth } from 'firebase/auth';

const join = async (email, password) => {
  try {
    const auth = getAuth();
    const { user } = await createUserWithEmailAndPassword(auth, email, password);
    const { stsTokenManager, uid } = user;
    setAuthInfo({ uid, email, authToken: stsTokenManager });
    navigate('/');
  } catch ({ code, message }) {
    alert(errorMessage[code]);
  }
};
회원가입(이메일 인증 O)
사용자가 입력한 이메일로 인증번호를 받아서 회원가입을 처리하고자 하는 경우에는 createUserWithEmailAndPassword 메소드로 사용자 계정을 등록한 후, sendEmailVerification 메소드를 사용하여 이메일 인증을 진행하면 된다.
sendEmailVerification 메소드는 이메일 인증을 위한 메일을 전송하는 메소드이며, auth 객체의 currentUser 값을 인자로 전달하여 사용할 수 있다.
import { createUserWithEmailAndPassword, getAuth, sendEmailVerification } from 'firebase/auth';

const joinWithVerification = async (email, password) => {
  try {
    const auth = getAuth();
    await createUserWithEmailAndPassword(auth, email, password);
    await sendEmailVerification(auth.currentUser);
    alert(authMessage['auth/post-email-verification-mail']);
  } catch ({ code, message }) {
    alert(errorMessage[code]);
  }
};
위 함수를 실행하면 다음과 같이 이메일 인증 URL이 포함된 이메일이 사용자에게 전송된다.
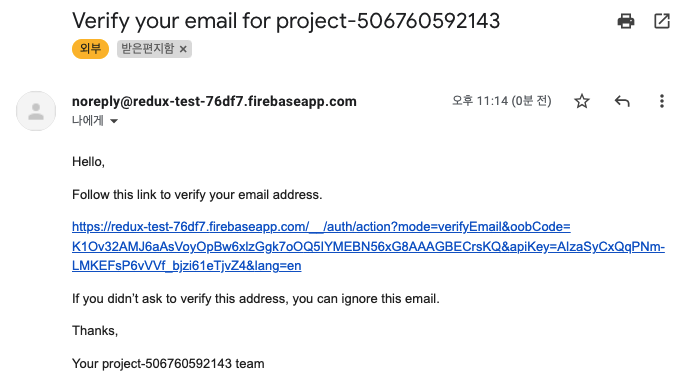
이메일 인증이 완료되면 auth 객체의 currentUser.emailVerified 값이 true로 바뀌게 된다.
만약 이메일 인증이 완료된 사용자만 로그인이 가능하도록 처리하려면 currentUser.emailVerified 값이 true인 사용자만 로그인을 허용하면 된다.
이메일 인증 메일 내용 포맷 변경은 프로젝트 - Authentication - Templates에서 할 수 있다.
비밀번호 변경
비밀번호는 updatePassword 메소드를 사용하여 변경할 수 있다.
첫 번째 인자로 user 객체, 두 번째 인자로 바꾸고자 하는 새로운 비밀번호를 전달하면 된다.
import { getAuth, updatePassword } from 'firebase/auth';

const changePassword = async (newPassword) => {
  try {
    const auth = getAuth();
    const user = auth.currentUser;
    const res = await updatePassword(user, newPassword);
    console.log(res);
  } catch ({ code, message }) {
    console.log(code);
    alert(errorMessage[code]);
  }
};
비밀번호 재설정 이메일을 사용하여 비밀번호를 변경하고 싶다면 sendPasswordResetEmail 메소드를 사용하면 된다.
첫 번째 인자로 auth 객체, 두 번째 인자로 이메일 주소를 전달하면 된다.
const changePasswordUsingEmail = async () => {
  try {
    const auth = getAuth();
    await sendPasswordResetEmail(auth, authInfo.email);
    alert(authMessage['auth/post-password-reset-mail']);
  } catch ({ code, message }) {
    console.log(code);
    alert(errorMessage[code]);
  }
};
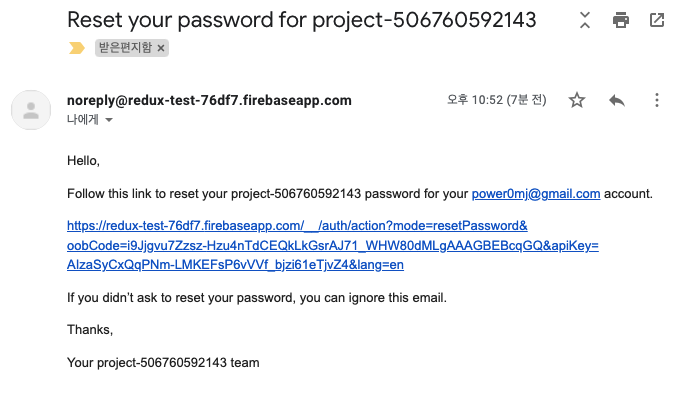
위 함수를 실행하면 다음과 같이 비밀번호 재설정 URL이 포함된 이메일이 사용자에게 전송된다.
비밀번호 재설정 메일 내용 포맷 변경도 마찬가지로 프로젝트 - Authentication - Templates에서 할 수 있다.
로그인/로그아웃
로그인은 signInWithEmailAndPassword, 로그아웃은 signOut 메소드를 사용한다.
로그인의 경우에는 회원가입과 마찬가지로 auth 객체, email, password를 순서대로 인자로 전달하면 되고, 로그아웃은 auth 객체만 인자로 전달하면 된다.
import { getAuth, signInWithEmailAndPassword, signOut } from 'firebase/auth';

const login = async (email, password) => {
  try {
    const auth = getAuth();
    const { user } = await signInWithEmailAndPassword(auth, email, password);
    const { stsTokenManager, uid } = user;
    setAuthInfo({ uid, email, authToken: stsTokenManager });
    navigate('/');
  } catch ({ code, message }) {
    alert(errorMessage[code]);
  }
};

const logout = async () => {
  const isLogOut = window.confirm(authMessage['auth/logout-confirm']);
  if (!isLogOut) return;

  try {
    const auth = getAuth();
    await signOut(auth);
    setAuthInfo(initialState);
    navigate('/');
  } catch ({ code, message }) {
    alert(errorMessage[code]);
  }
};
회원 탈퇴
사용자 삭제는 deleteUser 메소드를 사용하면 되며, auth 객체의 currentUser 값을 인자로 전달하여 사용할 수 있다.
import { getAuth, deleteUser } from 'firebase/auth';

const secession = async () => {
  const isSecession = window.confirm(authMessage['auth/secession-confirm']);
  if (!isSecession) return;

  try {
    const auth = getAuth();
    const user = auth.currentUser;
    await deleteUser(user);
    alert(authMessage['auth/secession-success']);
    navigate('/');
  } catch ({ code, message }) {
    alert(errorMessage[code]);
  }
};
사용자 상태 관리 메소드
사용자 상태 관리에 사용되는 onAuthStateChanged 메소드는 현재 접속한 사용자의 상태가 변경되었을 경우 실행된다.
첫 번째 인자로 auth 객체, 두 번째 인자로 currentUser 객체를 인자로 받는 콜백 함수를 전달한다.
콜백 함수의 인자인 user 값이 존재하는 경우에는 로그인 된 사용자 정보가 존재한다는 뜻이며, 반대의 경우에는 로그인 된 사용자 정보가 존재하지 않을 때라고 보면 된다.
import { getAuth, onAuthStateChanged } from 'firebase/auth';

const auth = getAuth();

onAuthStateChanged(auth, (user) => {
  if (user) {
    // 사용자 로그인 시 동작
    console.log('login');
    return;
  }
  // 사용자 로그아웃 시 동작
  console.log('logout');
});
사용자 재인증
최근에 로그인 한 기록이 없는 경우 인증 정보가 만료되어 회원 탈퇴, 비밀번호 변경 등 사용자 정보 변경이 불가능하다.
이러한 경우, reauthenticateWithCredential 메소드를 사용하여 재인증 과정을 거친 후에 해당 메소드를 호출할 수 있다.
import { EmailAuthProvider, getAuth, reauthenticateWithCredential } from 'firebase/auth';

const reAuthentication = async (password) => {
  try {
    const auth = getAuth();
    const user = auth.currentUser;
    const email = auth.currentUser.email;
    const credential = EmailAuthProvider.credential(auth.currentUser.email, password);
    const { user: reAuthenticatedUser } = await reauthenticateWithCredential(user, credential);
    const { stsTokenManager, uid } = reAuthenticatedUser;
    setAuthInfo({ uid, email, authToken: stsTokenManager });
  } catch ({ code, message }) {
    alert(errorMessage[code]);
  }
};
firebase auth error code
firebase auth에서 자주 발생하는 에러 코드와 설명을 정리했다.
| code | 설명 |
| auth/user-not-found | 존재하지 않는 사용자 정보로 로그인을 시도한 경우 발생 |
| auth/wrong-password | 비밀번호가 잘못된 경우 발생 |
| auth/too-many-requests | 연속된 로그인 요청이 여러 번 감지되어 로그인 요청이 금지됨 |
| auth/weak-password | 비밀번호가 6자리 미만인 경우 발생 |
| auth/invalid-email |
잘못된 포맷의 이메일을 입력한 경우 발생 |
| auth/email-already-in-use | 이미 사용 중인 이메일 계정 ID로 회원 가입을 시도하는 경우 발생 |
| auth/invalid-phone-number | 잘못된 포맷의 핸드폰 번호를 입력한 경우 발생 |